How to Add the Polygon Network to Metamask?
Polygon network offers a few key benefits over the Ethereum main-net to solve the scalability issues of Ethereum. And because it is based on Ethereum, you can easily use your Matic tokens on Ethereum applications like Metamask. Here is how to quickly add and set up the Polygon network in MetaMask.
Before we begin, keep in mind that if you want to import your matic tokens, ensure you are on the same account as that linked with the polygon network.
- Open Metamask Ensure you have installed the MetaMask extension and open it. Learn how to install and set up Metamask from here if you haven’t already.
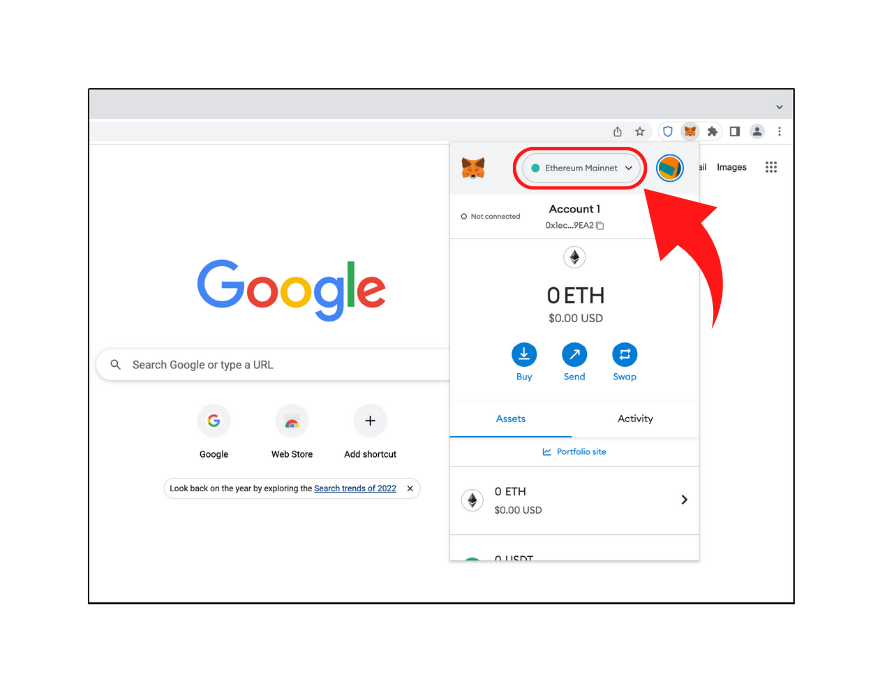
- Go to networks The center-top section shows your current network in MetaMask. By default, it will be the Ethereum mainnet. Click on that.
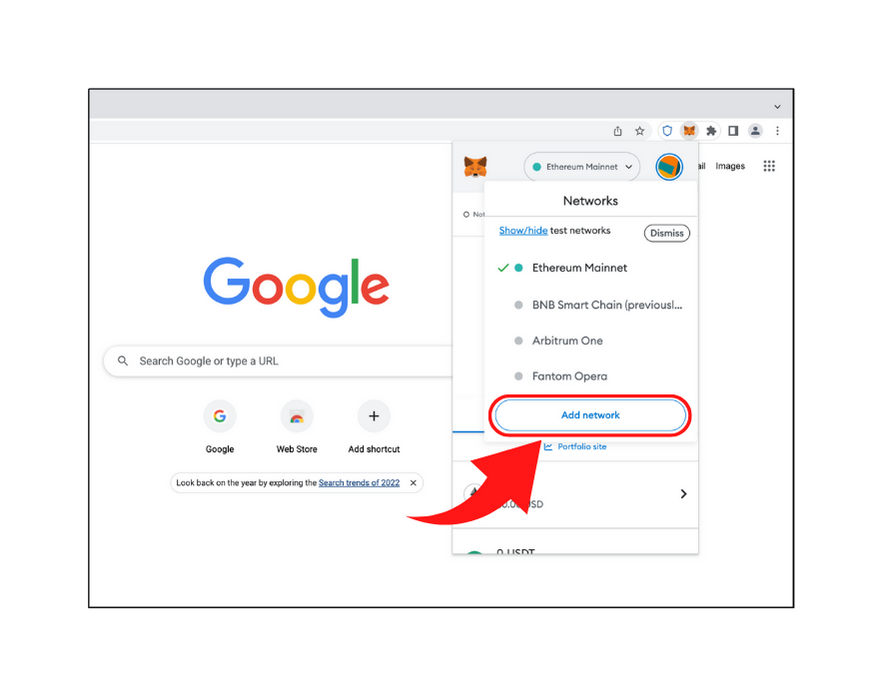
- Add network Click on the “Add Network” button at the bottom of the menu.
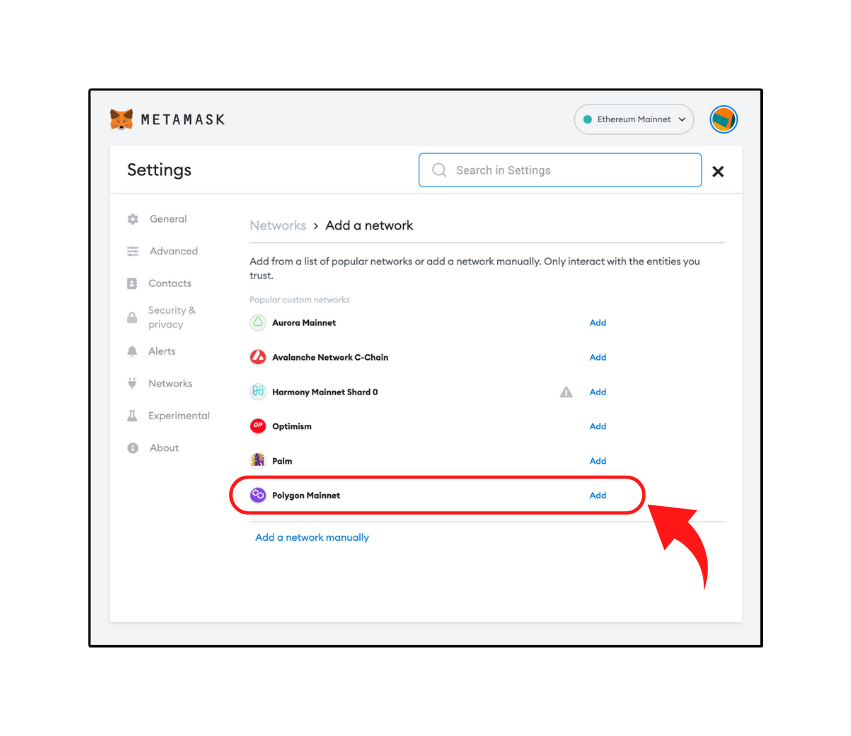
- Select the Polygon network The popular networks will be shown on the next screen with an “Add” button next to each. We need to find the polygon mainnet in this list and click on the add button.
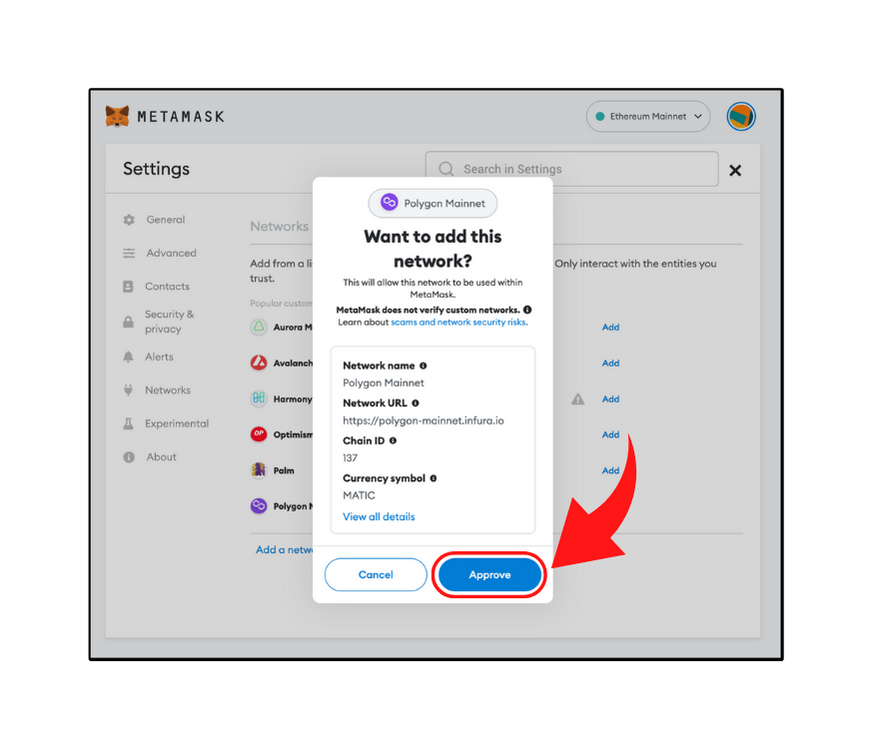
- Approve Network details will be visible to you with a cancel and an approve button. Verify if these details are right by comparing these with the screenshot or checking the official website
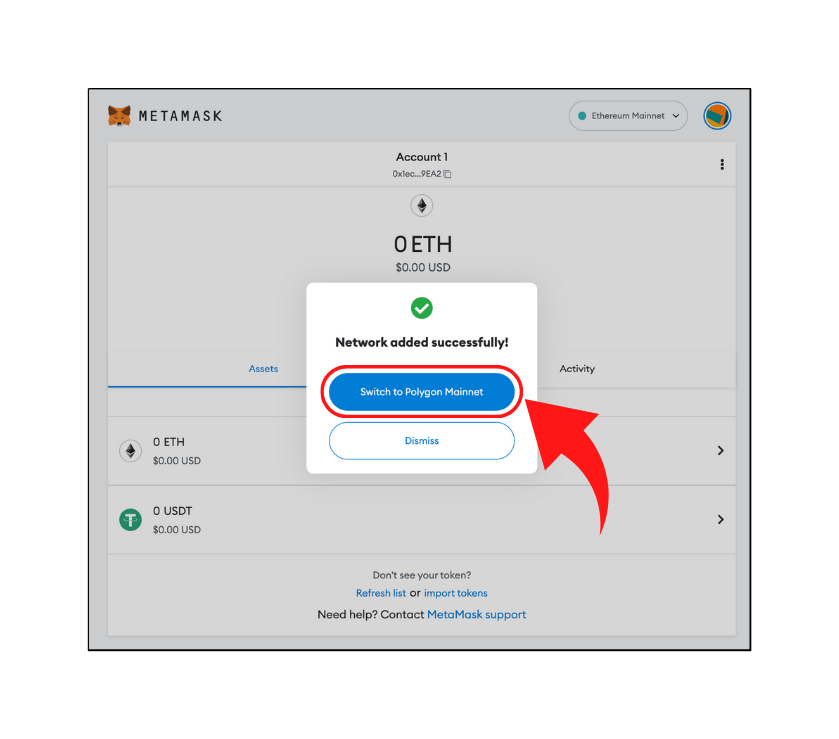
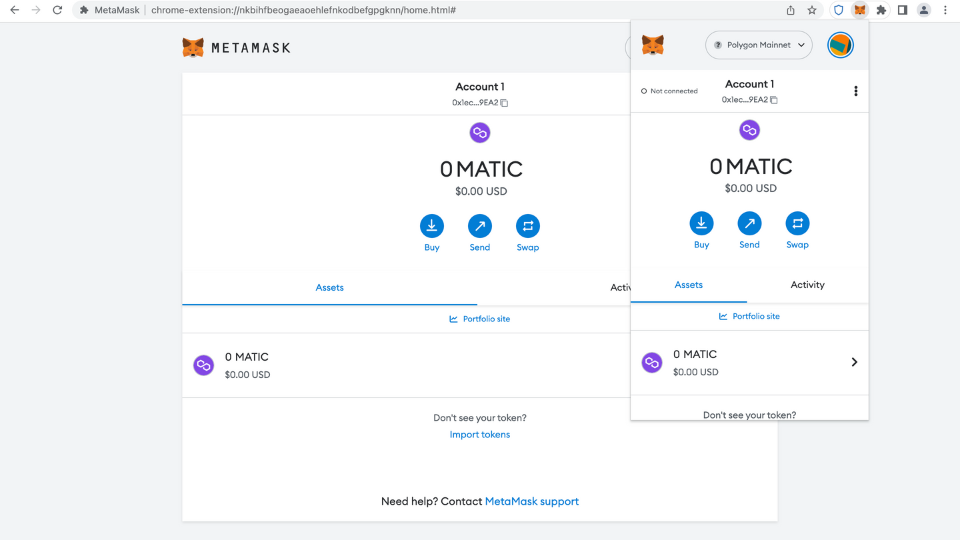
- Switch The Network has been successfully added to your Metamask extension. Click Switch to start using that network. You can always change the network by going to the networks tab (step 2) and changing it to the one you want.

- Latest Articles
- How to Send Crypto on Metamask?
- How to Send Crypto on Trust Wallet?
- How to Add Optimism Network to Metamask
- How to Add the Polygon Network to Metamask?
- Where to Find the Private Key in Metamask?
- How to See BSC Address in Trust Wallet?
- How to Find a Recovery Phrase in the Trust Wallet?
- Is My MetaMask Address Same for Different Networks?
- How to Change Accounts in MetaMask?
- How to Change Networks in MetaMask?
- Where is the USDT Address in MetaMask?
- How to Delete Tokens in MetaMask?
- How to Add the Fantom Network in MetaMask?
- How to Add Custom Token in Trust Wallet?
- MetaMask Alternatives: Top 3 Best Non-Custodial Wallet Extensions
- How to Install and Setup Trust Wallet Extension on Chrome?
- How to Import Account From Trust Wallet to MetaMask in Browser?
- How to Find The Secret Recovery Phrase in MetaMask Extension?
- How to Import an Account in MetaMask with a Private Key?
- How to Add Arbitrum in MetaMask?
- How to Import Custom Tokens in MetaMask?
- How to Import Tokens in Metamask?
- How to See QR Code in MetaMask?
- How to Add BUSD in MetaMask?
- What is Gas Fee on Ethereum?
- How to Install and Setup MetaMask on Android
- How to Change Name in MetaMask?
- How to Get Free ETH in MetaMask?
- Two Ways to Add Avalanche Network / Token in Metamask
- How to Add BNB Network in MetaMask?
- What is a Private Key on The Blockchain?
- What is a Seed Phrase or Secret Recovery Phrase?
- How to Import MetaMask Wallet With Seed Phrase?
- How to Install Metamask on Chrome?
- Forgot MetaMask Password? How to Reset?